
Mouse stopped moving right when you needed it? Wondering if you need spare AA batteries, or if that sleek Apple mouse charges up some other way? Let’s sort it out.
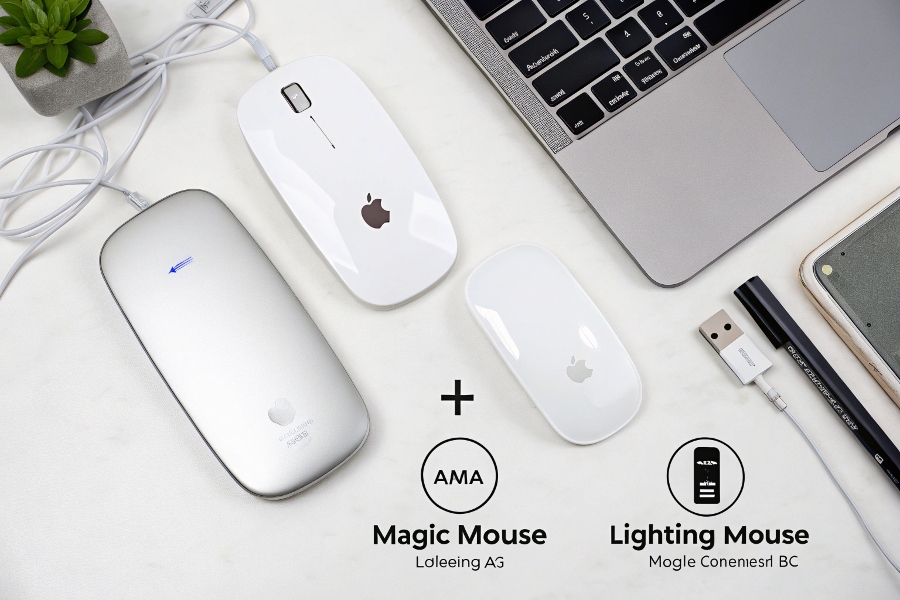
You charge modern Apple wireless mice, like the Magic Mouse (2nd generation and later), using a Lightning cable plugged into a port on the mouse’s underside. It has a built-in rechargeable battery, ditching the need for disposable ones.

Knowing it’s rechargeable is great, but maybe you’re asking which specific models work this way, or how exactly the process goes. As someone running FUMEI, focusing on reliable charging, I know clear instructions are vital. Let’s get into the specifics for your Apple mouse.
Which Apple mice are actually rechargeable?
Got an Apple mouse but not sure if it’s the kind you recharge or the kind needing batteries? It’s confusing since they’ve looked similar over the years. Don’t want to search for a port that isn’t there!
The key distinction is between the Magic Mouse (2nd generation and later), which is rechargeable via a Lightning port, and the older Magic Mouse (1st generation) or Mighty Mouse, which rely on replaceable AA batteries.
Identifying your model is the first step. This difference is important – trying to plug a cable into a mouse designed for AAs won’t work! Let’s look closer at how Apple transitioned and how to tell them apart.
The Shift from Batteries to Built-in
Apple’s earlier wireless peripherals, including the first Magic Mouse (released 2009) and the even older Mighty Mouse (wireless version released 2006), required users to swap out AA batteries. This was common at the time but could be inconvenient, requiring spare batteries on hand and creating waste.
With the introduction of the Magic Mouse 2 in 2015 (alongside updated wireless keyboards and trackpads), Apple switched to integrated lithium-ion batteries, rechargeable via the standard Lightning cable used for iPhones and iPads at the time. This offered a more seamless experience, aligning with their other devices. All subsequent standalone Magic Mouse versions sold by Apple follow this rechargeable design.
Identifying Your Mouse
How can you tell which one you have?
- Look at the Bottom: This is the easiest way.
- Rechargeable (Magic Mouse 2 or later): You’ll see a small Lightning port. There will be no removable cover or obvious battery compartment.
- AA Battery Powered (Magic Mouse 1): You’ll see a thin aluminum removable cover near the bottom edge. Sliding this down reveals the compartment for two AA batteries. There is no charging port.
- AA Battery Powered (Mighty Mouse): This older, usually white plastic mouse has a clearly visible latch or button on the bottom to release the battery cover, typically holding one or two AA batteries.
| Feature | Magic Mouse (2nd Gen / Later) | Magic Mouse (1st Gen) | Mighty Mouse (Wireless) |
|---|---|---|---|
| Power Source | Built-in Rechargeable Battery | 2 x AA Batteries | 1 or 2 x AA Batteries |
| Charging Method | Lightning Port (on bottom) | N/A (Replace Batteries) | N/A (Replace Batteries) |
| Bottom View | Smooth, small port visible | Removable metal strip | Latch for battery cover |
So, if you find that Lightning port1 on the bottom, you’re good to go for recharging! If not, you’ll need some fresh AA batteries.
What’s the step-by-step charging process?
Found the Lightning port on your Magic Mouse? Great! But maybe you’re hesitant – just plug it in? What cable do you use, and where does the other end go? Don’t worry, it’s designed to be simple.
Just connect the Lightning end of a Lightning-to-USB cable to the port on the mouse’s bottom. Plug the USB end (either USB-A or USB-C, depending on your cable) into your Mac, a compatible wall adapter, or a powered hub.
It really is straightforward, but let’s walk through the details, including cable types and what to expect, ensuring you charge efficiently and safely – key principles we follow at FUMEI.
Step-by-Step Guide
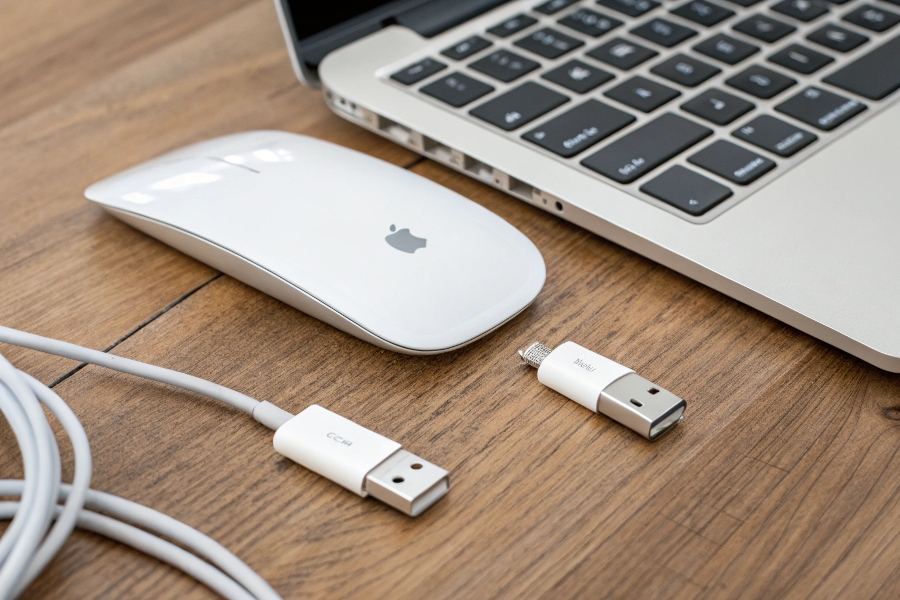
- Locate the Port: Flip your Magic Mouse over. You’ll see the small, pill-shaped Lightning port, usually located between the glide rails.
- Find Your Cable: You need a Lightning-to-USB cable2. This is the same type of cable commonly used to charge iPhones and iPads (prior to newer USB-C models). The cable might have a standard rectangular USB-A connector or the smaller oval USB-C connector on the other end.
- Connect to Mouse: Gently plug the small Lightning connector into the port on the mouse. It only fits one way.
- Connect to Power Source: Plug the other end (USB-A or USB-C) into a power source. Common options include:
- A USB port on your Mac (iMac, MacBook, Mac mini, etc.).
- A USB wall adapter (like the one for your iPhone or iPad).
- A powered USB hub.
- A USB port on an external display that provides power.
- Charging Starts: The mouse will begin charging immediately. There isn’t usually a persistent indicator light on the mouse itself while charging, but your Mac should recognize it’s connected and charging (more on checking the level next).
Important Considerations
- Cable Type: Most Magic Mouse models likely came with a Lightning-to-USB-A cable. Newer Macs often feature USB-C ports, so you might need a Lightning-to-USB-C cable or a USB-A to USB-C adapter if connecting directly to a newer Mac or USB-C charger. Any standard Apple-certified Lightning cable should work.
- Can You Use It While Charging? No. Due to the port’s location on the bottom, the Magic Mouse cannot be used while the Lightning cable is plugged in. This was a somewhat controversial design choice by Apple.
- Charging Time: A full charge can take around 2 hours. However, Apple states that even a quick 2-minute charge can provide enough power for a typical day’s use (around 9 hours), which is handy if you get caught short.
- Battery Life: Once fully charged, the Magic Mouse battery can last a month or more depending on usage patterns.
How can you check the mouse battery level?
Got your Magic Mouse charging or just want to know how much juice is left? Don’t want it dying unexpectedly mid-task? Checking the battery level is easy, right from your Mac.
You can quickly see the remaining charge percentage by clicking the Bluetooth icon in your Mac’s menu bar or by going into System Settings (or System Preferences on older macOS versions) under the Bluetooth or Mouse section.

Knowing how to check helps you avoid interruptions. Keeping track of power levels is essential for any wireless device, something we’re always mindful of when designing charging solutions at FUMEI. Let’s see exactly where to look.
Checking via Menu Bar (Quickest Method)
- Ensure Bluetooth is On: Make sure Bluetooth is enabled on your Mac.
- Look for the Icon: Find the Bluetooth symbol (looks like a stylized ‘B’) in the menu bar at the top right of your screen. If it’s not there, go to System Settings > Control Center and set Bluetooth to "Show in Menu Bar."
- Click the Icon: Click the Bluetooth symbol.
- Find Your Mouse: Hover over or look at the entry for your connected Magic Mouse in the dropdown list.
- See the Percentage: The current battery percentage should be displayed next to the mouse’s name.
Checking via System Settings / Preferences
- Open System Settings/Preferences: Click the Apple menu () in the top-left corner and choose "System Settings…" (on macOS Ventura and later) or "System Preferences…" (on macOS Monterey and earlier).
- Navigate to Bluetooth or Mouse:
- On macOS Ventura or later: Scroll down the left sidebar and click "Bluetooth." Find your Magic Mouse in the list of devices on the right; the battery percentage will be shown there. Alternatively, click "Mouse" in the sidebar, and the battery level is often displayed at the top of the window.
- On macOS Monterey or earlier: Click the "Bluetooth" icon. Find your mouse in the list; the percentage should be visible. Or, click the "Mouse" icon; the battery level is usually shown at the bottom of the window.
Low Battery Warnings
Your Mac will typically display a notification on screen when the mouse battery level gets low (e.g., below 10-20%), prompting you to recharge it soon. This gives you a heads-up before it completely runs out.
| Checking Method | Steps | Best For |
|---|---|---|
| Menu Bar Icon | Click Bluetooth icon > Find mouse in list > Read percentage. | Quick glance |
| System Settings (Ventura+) | Apple Menu > System Settings > Bluetooth OR Mouse > Find mouse/level. | Detailed view |
| System Preferences (Monterey-) | Apple Menu > System Preferences > Bluetooth OR Mouse > Find mouse/level. | Detailed view |
Keeping an eye on the battery level using these methods ensures your Magic Mouse is always ready when you need it.
Conclusion
Charging your modern Apple Magic Mouse is simple: use a Lightning cable connected to the port on its underside and plug the other end into your Mac or a USB power adapter. Just remember you can’t use it while charging!